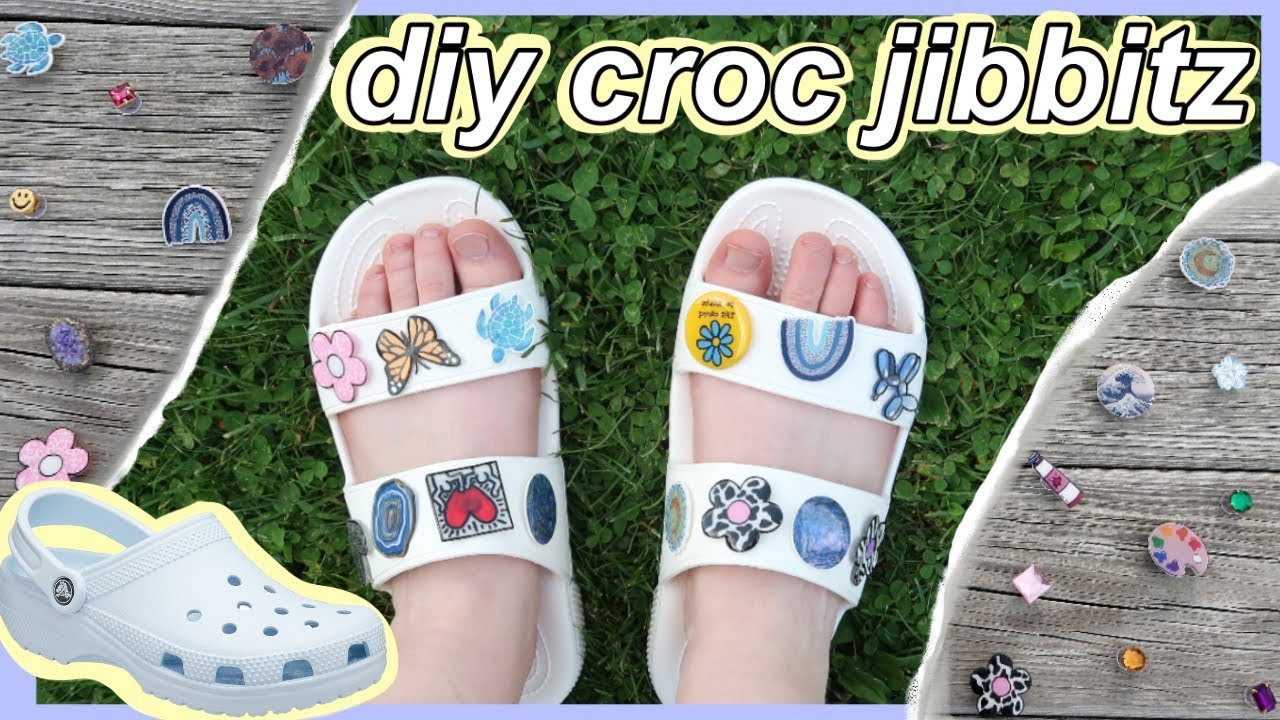
Looking to add a touch of personal style to your Crocs? Well, you’re in luck! In this blog article, we’ll show you how to make your own croc charms effortlessly. Whether you want to unleash your creativity, jazz up your footwear, or simply give your Crocs a unique twist, we have the solution for you. With our step-by-step guide, you’ll discover just how easy and fun it is to make your own croc charms. So, let’s dive right in and get started on this exciting DIY project!
How to Make Your Own Croc Charms
If you’re looking to add some personal touch to your Crocs, making your own charms is a fun and creative way to do it. With a bit of imagination and some basic crafting supplies, you can create unique charms that reflect your personality and style. In this article, we will guide you through the process of making your own croc charms step by step. So let’s get started!
Gather Your Supplies
Before you begin, it’s essential to gather all the necessary supplies to ensure a smooth crafting experience. Here’s a list of what you’ll need:
1. Polymer clay in various colors
2. Charm hooks or jump rings
3. Needle tool or toothpick
4. Rolling pin or clay roller
5. Craft knife or small scissors
6. Acrylic paint and paintbrushes
7. Glossy varnish (optional)
8. Pliers (if using charm hooks)
9. Baking sheet and oven
Section 1: Choosing Your Design
The first step is to decide on the design of your croc charms. You can choose from various themes such as animals, flowers, food, or symbols. It’s a good idea to sketch out your ideas on paper before you start working with the clay. This will help you visualize the final product and make any necessary adjustments to the design.
Section 1.1: Sketching Your Design
Grab a pencil and paper and start sketching your croc charm designs. Don’t worry about making them perfect; this is just a rough outline to get your creative juices flowing. Experiment with different shapes, sizes, and patterns until you find something you love.
Section 1.2: Choosing Colors
Once you have your design sketched out, it’s time to decide on the colors for your croc charms. Polymer clay comes in a wide range of vibrant hues, allowing you to mix and match to your heart’s content. Consider the color of your Crocs and opt for contrasting or complementary shades to make your charms stand out.
Section 2: Crafting Your Charms
Now that you have your design and colors sorted, it’s time to bring your croc charms to life. Follow these steps to create your own personalized charms:
Section 2.1: Preparing the Clay
Start by kneading the polymer clay in your hands to soften it. This will make it easier to work with and prevent cracking during the baking process. Once the clay is pliable, roll it into a ball and flatten it with a rolling pin or clay roller until it’s about 1/8 inch thick.
Section 2.2: Cutting out the Shape
Using a craft knife or small scissors, carefully cut out the shape of your croc charm from the flattened clay. If you’re unsure about cutting freehand, you can create a template out of paper and trace around it on the clay.
Section 2.3: Adding Details
Now is the time to add any additional details to your charm. Use a needle tool or toothpick to create texture, patterns, or facial features. You can also embed small beads or rhinestones to add some sparkle.
Section 2.4: Baking the Charms
Once you’re satisfied with your croc charm, carefully transfer it onto a baking sheet and place it in a preheated oven according to the instructions on the clay packaging. Most polymer clays require baking at around 275°F (135°C) for about 15-20 minutes.
Section 3: Painting and Finishing
After baking and cooling, your croc charms are ready for the finishing touches. Painting and varnishing will give them a polished look and protect the clay surface.
Section 3.1: Painting
Using acrylic paint and a small brush, carefully paint your croc charms with vibrant colors. Allow the paint to dry completely before moving on to the next step.
Section 3.2: Varnishing
For added protection and a glossy finish, you can apply a coat of glossy varnish to your charms. This step is optional but recommended, especially if you plan to wear them outdoors.
Section 4: Adding Charms to Your Crocs
Now that your croc charms are complete, it’s time to attach them to your Crocs. There are two main methods you can use: using charm hooks or jump rings.
Section 4.1: Using Charm Hooks
If you prefer a more secure attachment, you can use charm hooks. Simply insert the hook into the hole of your charm and use pliers to close the loop securely. Then, slide the hook through the holes of your Crocs, and voila! Your charms are ready to rock.
Section 4.2: Using Jump Rings
Jump rings are another popular option for attaching charms. Open the jump ring with pliers, slide it through the hole in your charm, and close it back up. Then, thread the jump ring through the holes of your Crocs, and you’re good to go.
Making your own croc charms is a fantastic way to personalize your footwear and showcase your creativity. By following the steps outlined in this article, you can design and create unique charms that reflect your style. Whether you’re a beginner or an experienced crafter, this DIY project is sure to bring a touch of charm to your Crocs. So, gather your supplies and start crafting your one-of-a-kind croc charms today!
How to Make JIBBITZ! (Croc charms)
Frequently Asked Questions
What materials do I need to make my own croc charms?
To make your own croc charms, you will need some basic materials such as polymer clay, charm hooks, a rolling pin, clay sculpting tools, acrylic paints, and some clear glaze or varnish to protect the finished charms.
How do I shape the croc charms?
Start by softening the polymer clay in your hands and then roll it out into a thin sheet using a rolling pin. Use crocodile-shaped cookie cutters or clay sculpting tools to cut out the desired shapes for your croc charms.
What should I do next after shaping the charms?
Once you have shaped the croc charms, carefully insert a charm hook into each piece so they can be easily attached to your Crocs or other accessories. Make sure the hook is securely embedded in the clay to prevent it from coming loose later.
How do I add color to my croc charms?
Before baking the charms, paint them with acrylic paints to add color and detail. You can use a small brush to carefully apply the paint, ensuring that you cover the entire surface of the charm. Let the paint dry completely before moving on to the next step.
How do I protect the croc charms after painting?
To protect the painted surface of your croc charms, apply a thin layer of clear glaze or varnish using a small brush. This will not only add shine but also help to prevent the paint from chipping or fading over time. Let the glaze dry completely before using the charms.
Can I customize the croc charms with additional decorations?
Absolutely! Once the base is complete, you can further personalize your croc charms by adding small decorations or accents using other materials like rhinestones, beads, or even tiny charms. Get creative and experiment with different designs to make your croc charms uniquely yours!
Final Thoughts
In conclusion, creating your own croc charms can be a fun and creative way to personalize your footwear. By following the steps outlined in this article, you can easily make unique and stylish charms that will add a touch of personality to your Crocs. From gathering supplies to designing and attaching the charms, the process is straightforward and can be enjoyed by anyone. So, why not give it a try and make your own croc charms today?


