Are you looking to add a personal touch to your Crocs? Look no further! In this blog article, we will show you how to make rubber jibbitz for Crocs, bringing a fun and unique flair to your favorite footwear. Whether you want to showcase your creativity or simply want to stand out from the crowd, this DIY project is perfect for you. So, without further ado, let’s dive into the exciting world of customizing your Crocs with homemade rubber jibbitz!
How to Make Rubber Jibbitz for Crocs
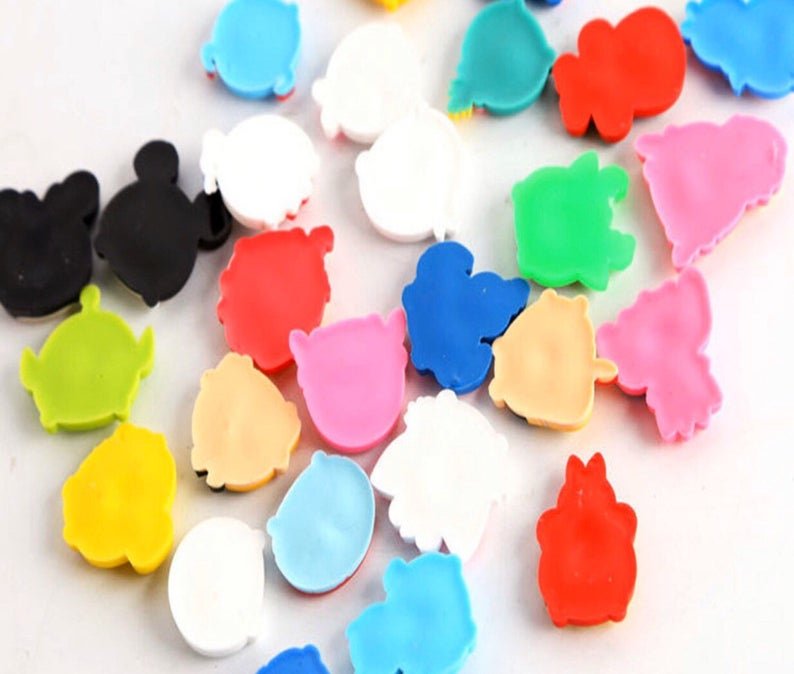
Crocs shoes have become a popular footwear choice for people of all ages. One of the unique features of Crocs is their ability to personalize them with colorful rubber charms called Jibbitz. These Jibbitz can be attached to the ventilation holes on the shoes, allowing wearers to express their individuality and style. If you’re looking to add a personal touch to your Crocs, why not try making your own rubber Jibbitz? In this article, we will guide you through the process of making custom rubber Jibbitz for your Crocs.
Section 1: Gathering Supplies
Before you start making your rubber Jibbitz, it’s important to gather all the necessary supplies. Here’s what you’ll need:
- 1. Silicone rubber compound
- 2. Jibbitz molds or Jibbitz disc
- 3. Silicone pigment
- 4. Mixing cups and sticks
- 5. Disposable gloves
- 6. Release agent (optional)
- 7. Clear sealant (optional)
Section 2: Preparing the Molds
Step 1: Clean the Jibbitz molds thoroughly to remove any dust or debris. This will ensure that the final product is clean and free from imperfections.
Step 2: Apply a thin layer of release agent to the molds. This step is optional but can help in releasing the rubber Jibbitz from the molds easily.
Section 3: Mixing the Rubber Compound
Step 1: Put on your disposable gloves to protect your hands.
Step 2: Measure out the required amount of silicone rubber compound according to the manufacturer’s instructions. It’s essential to follow the recommended ratio of silicone and catalyst for the best results.
Step 3: Pour the silicone rubber compound into a mixing cup and add the desired color pigment. Stir the mixture thoroughly until the color is evenly distributed.
Section 4: Pouring the Mixture into the Molds
Step 1: Slowly pour the mixed silicone rubber compound into the prepared molds. Fill each cavity completely to ensure the Jibbitz have a uniform thickness.
Step 2: Gently tap the molds on a flat surface to remove any air bubbles trapped in the mixture. This will help prevent any imperfections in the final product.
Section 5: Curing the Rubber Jibbitz
Step 1: Place the filled molds in a well-ventilated area and allow them to cure for the recommended time. The curing time may vary depending on the type of silicone rubber compound you’re using, so refer to the manufacturer’s instructions.
Step 2: Once the rubber Jibbitz have fully cured, carefully remove them from the molds. If you used a release agent, they should come out easily. If not, you may need to gently flex the mold to release the Jibbitz.
Section 6: Finishing Touches
Step 1: Inspect the rubber Jibbitz for any rough edges or imperfections. Use a small file or sandpaper to smooth them out if necessary.
Step 2: If you’d like to add extra protection and shine to your Jibbitz, apply a clear sealant over the surface. This step is optional but can enhance the durability and appearance of the Jibbitz.
Section 7: Attaching the Rubber Jibbitz to Crocs
Step 1: Once the rubber Jibbitz are fully finished, it’s time to attach them to your Crocs. Simply insert them into the ventilation holes on your shoes, ensuring a secure fit.
Step 2: Arrange the Jibbitz in any pattern or design you like. You can mix and match different colors and shapes to create a unique look.
Section 8: Maintenance and Care
To keep your rubber Jibbitz and Crocs in good condition, follow these tips:
- 1. Avoid excessive bending or pulling on the Jibbitz to prevent them from getting damaged.
- 2. Clean the Jibbitz regularly using mild soap and water. Avoid using harsh chemicals or abrasive cleaners.
- 3. Store your Crocs in a cool, dry place to prevent the rubber Jibbitz from deforming or fading.
Section 9: Safety Precautions
- 1. Always work in a well-ventilated area when using silicone rubber compounds to avoid inhaling any harmful fumes.
- 2. Wear disposable gloves to protect your skin from potential allergic reactions or irritation.
- 3. Keep the silicone rubber compounds out of reach of children and pets as they may be harmful if ingested.
Section 10: Conclusion
Making your own rubber Jibbitz for Crocs is a fun and creative way to personalize your shoes. With a few simple steps and the right materials, you can design unique charms that reflect your style and interests. So gather your supplies, follow the instructions, and let your imagination run wild. Get ready to showcase your one-of-a-kind Crocs with custom rubber Jibbitz!
making custom jibbitz for my crocs #shorts
Frequently Asked Questions
What materials do I need to make rubber jibbitz for crocs?
To make rubber jibbitz for crocs, you will need silicone rubber, a mold or template, a mixing container, coloring agents, and a release agent.
Where can I find silicone rubber for making jibbitz?
You can find silicone rubber at craft stores, online retailers, or specialty rubber suppliers. Look for a silicone rubber that is specifically designed for mold-making applications.
How do I create a mold or template for my jibbitz designs?
To create a mold or template, you can use various materials such as clay, wax, or 3D printing. Sculpt or shape your design to desired specifications and ensure it fits the croc’s jibbitz slot.
Can I customize the color of my rubber jibbitz?
Yes, you can customize the color of your rubber jibbitz by using coloring agents specifically formulated for silicone rubber. Mix the coloring agent with the silicone rubber base before pouring it into the mold.
How long does it take for the rubber jibbitz to cure?
The curing time for rubber jibbitz will vary depending on the brand and type of silicone rubber used. Follow the manufacturer’s instructions for the recommended curing time, which is usually around 24 hours.
How do I attach the rubber jibbitz to my crocs?
To attach the rubber jibbitz to your crocs, simply insert them into the designated slots on the shoes. Press firmly to ensure a secure fit. The flexible nature of the rubber jibbitz allows for easy insertion and removal.
Final Thoughts
In conclusion, making rubber jibbitz for crocs is a fun and creative way to personalize your footwear. By following simple steps such as gathering materials, sketching designs, creating molds, pouring rubber, and attaching the jibbitz to the crocs, you can easily DIY your own unique accessories. Whether you want to showcase your favorite characters, sports teams, or personal style, making rubber jibbitz allows you to express yourself. So go ahead and enjoy the process of crafting these custom accessories for your crocs, and let your creativity shine with your very own rubber jibbitz.


