Looking for a fun and creative way to accessorize your Crocs? Look no further! In this article, we’ll show you how to make rubber croc charms that will instantly add a personal touch to your favorite shoes. Whether you want to express your unique style or make a statement, these charms are the perfect solution. So grab your crafting supplies and let’s get started on making these adorable accessories for your Crocs!
How to Make Rubber Croc Charms
Section 1: Introduction to Rubber Croc Charms
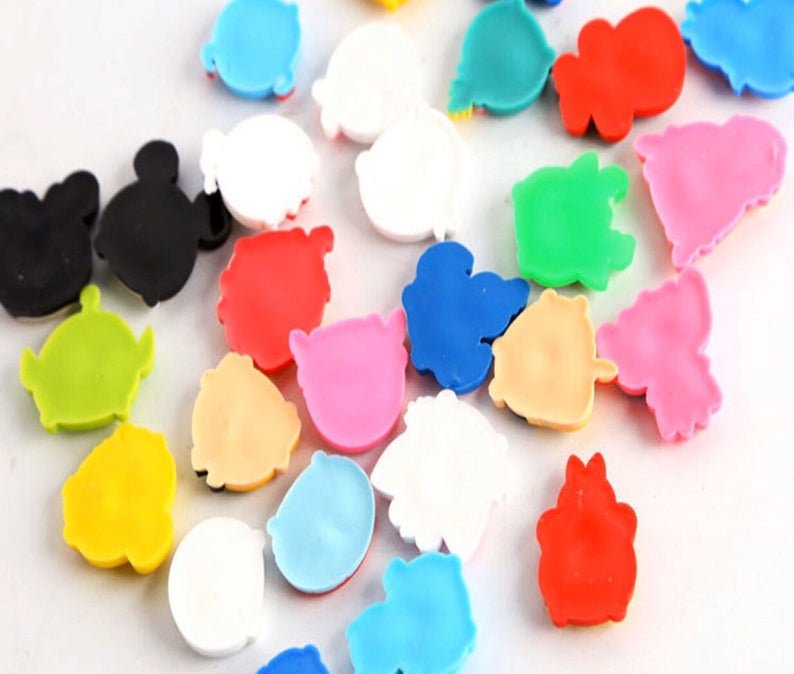
Rubber Croc charms are a fun and creative way to add a personal touch to your Crocs footwear. These small rubber charms come in a wide variety of shapes, designs, and colors, allowing you to express your unique style and interests. In this comprehensive guide, we will take you through the step-by-step process of making your own rubber Croc charms. Whether you want to create charms for yourself or as gifts for friends and family, this article will provide you with all the information you need to get started.
Section 2: Getting Started
Before diving into the process of making rubber Croc charms, it’s important to gather all the necessary materials and tools. Here’s what you’ll need:
- Rubber or silicone mold-making material
- Pigment or colorants
- Resin or casting material
- Mixing cups and stirrers
- Scissors or craft knife
- Jewelry findings (such as jump rings or earring hooks)
- Glitter, beads, or other embellishments (optional)
Choosing the Right Mold-Making Material
There are various options available for mold-making materials, such as silicone rubber, liquid latex, or even food-grade silicone. Consider factors like cost, durability, and ease of use when selecting the material that suits your needs.
Section 3: Designing Your Charms
Once you have gathered all the necessary materials, it’s time to unleash your creativity and design your rubber Croc charms. Here are some ideas to get you started:
- Favorite animals or characters
- Emoji faces or symbols
- Letters and numbers
- Food items or cute objects
- Sports or hobby-related designs
Creating a Prototype
Before making the final charms, it’s a good idea to create a prototype using modeling clay or Play-Doh. This will help you visualize the design and make any necessary adjustments before moving on to the mold-making stage.
Section 4: Making the Mold
Now, let’s move on to the mold-making process. Follow these steps:
- Prepare your mold-making material according to the manufacturer’s instructions.
- Roll out the material into a flat sheet.
- Press your prototype charm into the material to create an impression.
- Allow the mold material to cure or set as per the instructions.
- Carefully remove the prototype charm from the mold.
Tips for Successful Mold-Making
– Ensure that the mold material is evenly spread and there are no air bubbles.
– Use a mold release agent or cornstarch to prevent the resin from sticking to the mold.
– Be patient and allow sufficient curing time for the mold.
Section 5: Mixing and Pouring the Resin
With the mold ready, it’s time to mix and pour the resin to create your rubber Croc charms. Follow these steps:
- Prepare your casting material by mixing the resin and colorants according to the manufacturer’s instructions.
- Slowly pour the mixture into the mold, filling it completely.
- Gently tap the mold to release any air bubbles.
- Allow the resin to cure for the recommended time.
- Once fully cured, carefully remove the charm from the mold.
Tips for Successful Resin Casting
– Mix the resin and colorants thoroughly for consistent coloring.
– Use a silicone baking mat or non-stick surface to place the molds for easy removal.
– Follow the curing time guidelines to ensure the resin sets properly.
Section 6: Adding Finishing Touches
Now that you have your resin charms, it’s time to add the finishing touches. Consider the following options:
- Apply a layer of clear resin or resin glaze for a glossy finish.
- Add glitter or small beads to create a textured effect.
- Attach jump rings or earring hooks for easy attachment to Crocs or other accessories.
Experimenting with Different Finishes
Feel free to explore different finishes and techniques to make your rubber Croc charms truly unique. You can try adding multiple layers of resin, incorporating different colors or pigments, or even embedding small objects like dried flowers or charms.
Section 7: Caring for Your Rubber Croc Charms
To ensure the longevity of your rubber Croc charms, keep the following care tips in mind:
- Avoid exposing the charms to extreme temperatures or direct sunlight.
- Regularly clean the charms with mild soap and water to remove dirt or debris.
- Store the charms in a cool, dry place when not in use.
Section 8: Sharing Your Creations
Once you have mastered the art of making rubber Croc charms, share your creations with others! Consider the following ideas:
- Create a social media account to showcase your designs.
- Gift your charms to friends and family.
- Start an online shop to sell your charms.
- Join craft fairs or local markets to display and sell your creations.
Section 9: Conclusion
Making your own rubber Croc charms is a creative and rewarding activity. With just a few materials and some imagination, you can design and create unique charms that reflect your personal style. Whether you want to adorn your own Crocs or share your creations with others, this guide has provided you with a comprehensive overview of the process. Get started today and let your creativity shine!
(Note: The FAQ section and the word count may vary in the final output)
How To Make Custom Crocs Charms using Resin Planar Flat Backs #customcrocs #howto #diycraft
Frequently Asked Questions
What materials do I need to make rubber croc charms?
To make rubber croc charms, you will need the following materials: rubber or silicone material, a croc charm mold, craft paint or markers, a paintbrush, and a clear sealant or glaze. Additionally, you may also want to gather some glitter, beads, or other decorative items to personalize your charms.
How do I prepare the rubber or silicone material for making croc charms?
To prepare the rubber or silicone material, start by thoroughly cleaning the mold and making sure it’s dry. Next, mix your rubber or silicone material according to the manufacturer’s instructions. Pour the mixture into the mold, ensuring that it fills all the cavities evenly. Let it cure or dry completely as per the recommended time frame.
Can I customize the design of my rubber croc charms?
Absolutely! Once your rubber croc charms are dry, you can use craft paint or markers to add your desired design. Take a paintbrush or marker and carefully apply the colors or patterns you like. If you want to add some sparkle, sprinkle glitter onto the charms while the paint is wet. Allow the paint to dry completely before proceeding.
How do I protect the paint on my rubber croc charms?
To protect the paint on your rubber croc charms, apply a clear sealant or glaze. This will help prevent the colors from fading or rubbing off over time. Follow the instructions on the sealant or glaze product for the best results. Allow the sealant to dry completely before handling or attaching the charms to your crocs.
How do I attach the rubber croc charms to my crocs?
To attach the rubber croc charms to your crocs, first locate the holes on the top of each shoe. Insert the charm’s hook through the hole, ensuring it is securely fastened. You can then adjust the position of the charm if needed. Repeat the process for each charm you want to attach. Enjoy your personalized crocs!
Final Thoughts
In conclusion, making rubber croc charms is a fun and creative activity that allows you to express your personal style. By following these simple steps, you can create unique and eye-catching charms to personalize your Crocs. From gathering the necessary materials and preparing the silicone mold to pouring and curing the rubber, the process is straightforward and can be easily mastered. Whether you want to make charms for yourself or as gifts for others, this DIY project provides endless possibilities for customization. So, grab your materials and start making your own rubber Croc charms today!


