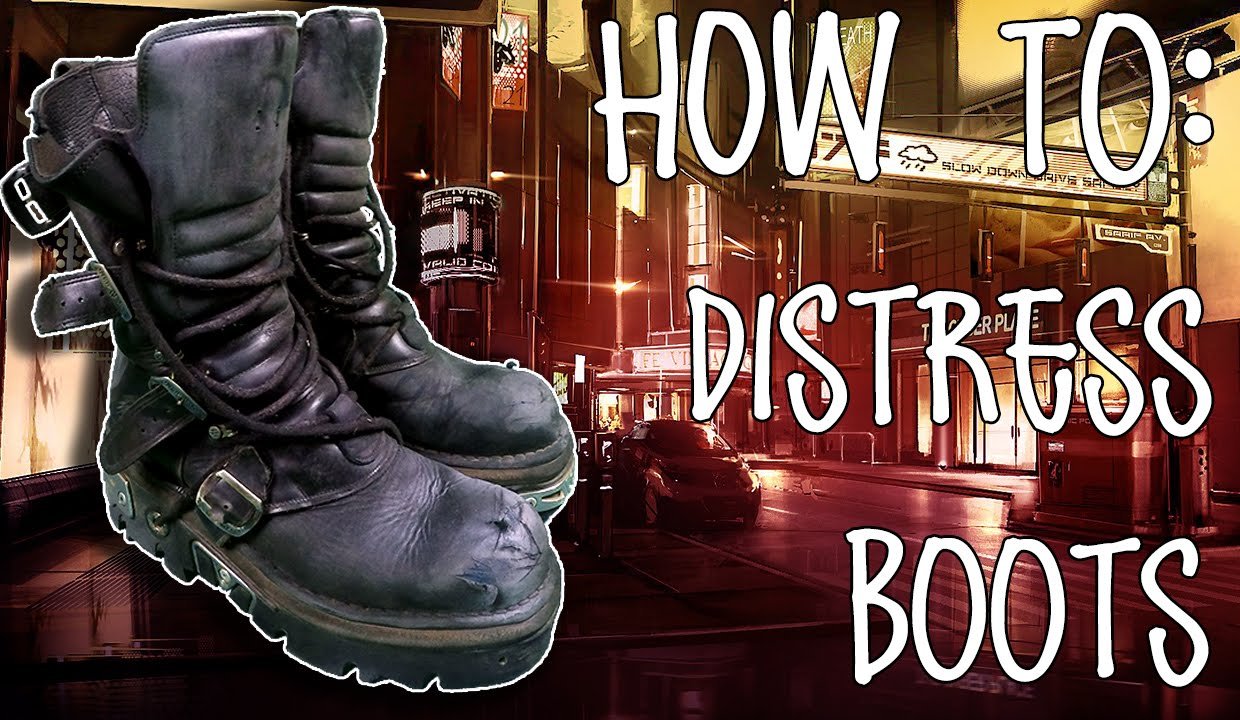
Do you have a pair of leather boots that could use a little roughing up and character? Well, you’re in luck! In this article, we’ll show you how to distress leather boots, giving them that rugged, worn-in look that’s oh-so-stylish. Distressing leather boots might seem like a daunting task, but fear not – we’ll guide you through the process step by step. So, grab your boots and let’s get started on transforming them into the perfectly worn and stylish footwear you’ve been dreaming of.
How to Distress Leather Boots: A Step-by-Step Guide
Distressing leather boots has become a popular trend, giving them a worn-in, rugged look that adds character and style. Whether you’re a fashion enthusiast or simply looking to revive an old pair of boots, distressing leather is a great way to achieve that desired vintage vibe. In this detailed guide, we will explore various techniques and methods to distress leather boots effectively. So, grab your boots and let’s get started!
1. Assessing Your Boots
Before you begin distressing your leather boots, it’s important to assess their condition. Take a close look at the material, stitching, and overall quality. Keep in mind that distressed leather boots may not be suitable for all occasions, so consider the purpose and setting in which you plan to wear them. Once you’ve made your assessment, you can proceed to the next step.
Gather the necessary supplies
To distress your leather boots, you’ll need a few tools and materials:
– Sandpaper (medium-grit and fine-grit)
– Leather conditioner
– Wire brush
– Cotton cloth
– Acetone or rubbing alcohol
– Leather dye or shoe polish (optional)
– Leather distressing agent (optional)
2. Preparing Your Boots
Preparing your leather boots for distressing is crucial to ensure the best results. Follow these steps to get your boots ready:
Clean the boots
Start by removing any dirt or dust from the boots. You can use a soft brush or a slightly damp cloth to gently clean the surface. Allow them to air dry completely before proceeding.
Protect the surrounding areas
Before distressing, cover any parts of the boots that you don’t want to be affected, such as zippers or buckles. This will help prevent accidental damage during the distressing process.
3. Distressing Techniques
Now that your boots are prepped, it’s time to put your distressing skills to use. There are several techniques you can employ to achieve the desired worn-in effect. Let’s explore some popular methods:
Sanding the leather
Using medium-grit sandpaper, gently rub the surface of the leather in a back-and-forth motion. Focus on areas that would naturally experience wear and tear, such as the toes, heels, and edges. Be cautious not to press too hard to avoid damaging the leather. Once you’ve achieved the desired level of distress, switch to a fine-grit sandpaper to smoothen out the rough edges.
Adding scuffs and scratches
To create scuffs and scratches, use a wire brush or sandpaper. Apply light pressure to specific areas, such as the heels and toes, to mimic the effects of regular wear. Vary the direction and intensity of your strokes to achieve a more natural appearance.
Applying distressing agents
There are specific distressing agents available in the market that can help accelerate the distressed look of your leather boots. Follow the instructions provided by the manufacturer to apply the agent evenly. These agents can create a range of effects, from subtle discoloration to deeper cracks and creases.
Experiment with dye or shoe polish
If you want to add a touch of color to your boots while distressing, consider using leather dye or shoe polish. Apply the dye or polish sparingly and blend it in using a cotton cloth. This technique can give your boots a beautifully aged appearance.
4. Conditioning and Protecting the Leather
After distressing your boots, it’s crucial to condition and protect the leather to maintain its quality and longevity. Follow these steps to keep your boots in top shape:
Apply leather conditioner
Using a clean cloth, apply a leather conditioner to the boots in circular motions. This helps nourish the leather and prevent it from drying or cracking. Be sure to choose a conditioner suitable for your specific type of leather.
Let the conditioner absorb
Allow the conditioner to absorb into the leather for the recommended amount of time specified on the product. This will ensure that the leather absorbs the conditioner properly, leaving it moisturized and supple.
Use a protective spray
To protect your distressed leather boots from everyday elements, consider using a leather protectant spray. This will create a protective barrier against water, stains, and dirt, helping to extend the life of your boots.
5. Styling Your Distressed Leather Boots
Now that you’ve successfully distressed and protected your leather boots, it’s time to style them. Distressed boots can add a touch of ruggedness to any outfit. Here are a few tips on how to incorporate them into your wardrobe:
Casual looks
Pair your distressed leather boots with jeans, a t-shirt, and a leather jacket for a classic casual look. This combination exudes a cool and effortless vibe.
Bohemian-inspired outfits
For a bohemian-inspired look, wear your distressed boots with a flowy maxi dress or a skirt, along with layered accessories. This combination balances the edginess of the boots with a touch of femininity.
Smart-casual ensembles
To elevate your smart-casual style, pair your distressed boots with tailored trousers or a blazer. This unexpected pairing creates a modern and trendy look.
Now that you’re familiar with the art of distressing leather boots, you can confidently unlock new styling possibilities and breathe life into your favorite pair. Remember, distressing is not only about creating a worn-in appearance, but also about expressing your unique sense of style. So, grab your boots and start experimenting with the various distressing techniques we’ve explored in this guide. Enjoy the process and embrace the character that comes with each scuff and scratch!
Distress Leather Boots | How To | Adam Cooper
Frequently Asked Questions
1. How can I distress leather boots?
To distress leather boots, you can start by cleaning and conditioning them to prepare the surface. Next, use sandpaper or a wire brush to roughen up the leather gently. You can also rub the boots with a mixture of water and vinegar to create a weathered effect. Additionally, applying leather distressing products like leather dye or shoe polish can enhance the distressed look. Finally, consider using a heat gun to create scuffs and creases for a more worn-in appearance.
2. Can I distress my leather boots at home?
Absolutely! Distressing leather boots can be done at home with a few basic tools and materials. By following proper techniques, you can achieve a beautifully distressed look without the need for professional assistance. Just make sure to take your time, work carefully, and test any products or techniques on a small, inconspicuous area of the boots before applying them to the entire surface.
3. What tools do I need to distress leather boots?
For distressing leather boots, you will need a few essential tools. These include sandpaper or a wire brush for roughening up the leather, a soft cloth for applying distressing products, leather dye or shoe polish for adding color and depth, and a heat gun for creating scuffs and creases. Additionally, having a leather conditioner and a brush or cloth for cleaning and conditioning the boots is recommended.
4. How long does it take to distress leather boots?
The time required to distress leather boots depends on the level of distressing you desire and the techniques you use. While some distressing techniques can be accomplished relatively quickly, others may require more time and effort. It’s important to remember that rushing through the process may result in unsatisfactory results. Take your time, experiment with different techniques, and enjoy the creative process of distressing your leather boots.
5. Can I distress any type of leather boots?
Distressing techniques can generally be applied to various types of leather boots, including full-grain, top-grain, and genuine leather. However, keep in mind that some leather types may be more receptive to distressing than others. Additionally, certain finishes or treatments on the leather may affect the outcome. It’s always best to test any distressing techniques or products on a small, inconspicuous area before applying them to the entire boot to ensure the desired result.
6. How do I maintain distressed leather boots?
After distressing your leather boots, it’s crucial to properly care for and maintain them to ensure their longevity. Regularly clean your boots with a soft brush or cloth and use a leather conditioner to keep the leather moisturized and supple. Avoid exposing them to excessive moisture or harsh weather conditions, as this can damage the distressed look. Additionally, store them in a cool, dry place away from direct sunlight when not in use.
Final Thoughts
In conclusion, distressing leather boots can be a satisfying and creative process. By following the steps outlined in this article, you can achieve a beautifully worn and aged look for your boots. Remember to use sandpaper, acetone, and other distressing tools carefully and in moderation to avoid damaging the leather. Experiment with different techniques such as scuffing, staining, and polishing to achieve your desired distressed effect. With proper care and maintenance, your distressed leather boots will continue to add character and style to your wardrobe for years to come. Start distressing your leather boots today to give them a unique and personalized touch.
