Looking to extend the life of your beloved Crocs? Well, you’re in luck! Repairing Crocs is easier than you might think. In this blog article, we will guide you through the simple yet effective steps on how to repair Crocs, ensuring that your favorite footwear stays in tip-top shape. Whether it’s a broken strap, a torn sole, or a minor hole, we’ve got you covered. So, let’s dive right in and learn how to fix those Crocs and keep them going for many more comfortable steps to come. Ready? Let’s get started!
How to Repair Crocs
Gather the Necessary Tools
When it comes to repairing your Crocs, it’s important to have the right tools on hand. Here’s a list of items you’ll need to get started:
- Scissors
- Strong adhesive, such as Shoe Goo or E6000
- Pliers
- Needle and thread
- Sandpaper
- Replacement rivets (if necessary)
Fixing a Broken Strap
One of the most common issues with Crocs is a broken strap. If you find yourself in this situation, follow these steps to repair it:
- Assess the damage: Determine the extent of the damage to the strap. Is it a clean break or just a small tear? This will help you decide on the best repair method.
- Trim any frayed edges: If the strap has frayed or torn edges, use a pair of scissors to trim them neatly.
- Apply adhesive: Apply a small amount of strong adhesive, such as Shoe Goo or E6000, to both ends of the broken strap.
- Press the ends together: Press the ends of the strap firmly together, holding them in place for a few minutes to allow the adhesive to bond.
- Allow time to dry: Let the adhesive dry completely before wearing your Crocs again. This can take several hours or overnight.
Fixing a Hole in the Sole
If you’ve accidentally punctured or worn a hole in the sole of your Crocs, don’t worry. Here’s how you can easily patch it up:
- Clean the area: Before you begin, make sure the area around the hole is clean and free from any dirt or debris. Use a damp cloth to wipe the surface.
- Sand the area: Gently sand the area around the hole using sandpaper. This will create a rough surface for better adhesive bonding.
- Apply adhesive: Apply a generous amount of strong adhesive, such as Shoe Goo or E6000, to cover the hole and the surrounding area.
- Press a patch over the hole: Cut a small piece of material, such as a spare Crocs strap or a strong fabric, slightly larger than the hole. Press it firmly over the adhesive, making sure it covers the entire area.
- Allow time to dry: Let the adhesive dry completely before wearing your Crocs. This usually takes a few hours or overnight.
Replacing Rivets
If the rivets on your Crocs have come loose or fallen off, replacing them is a simple fix. Follow these steps to get your Crocs back in shape:
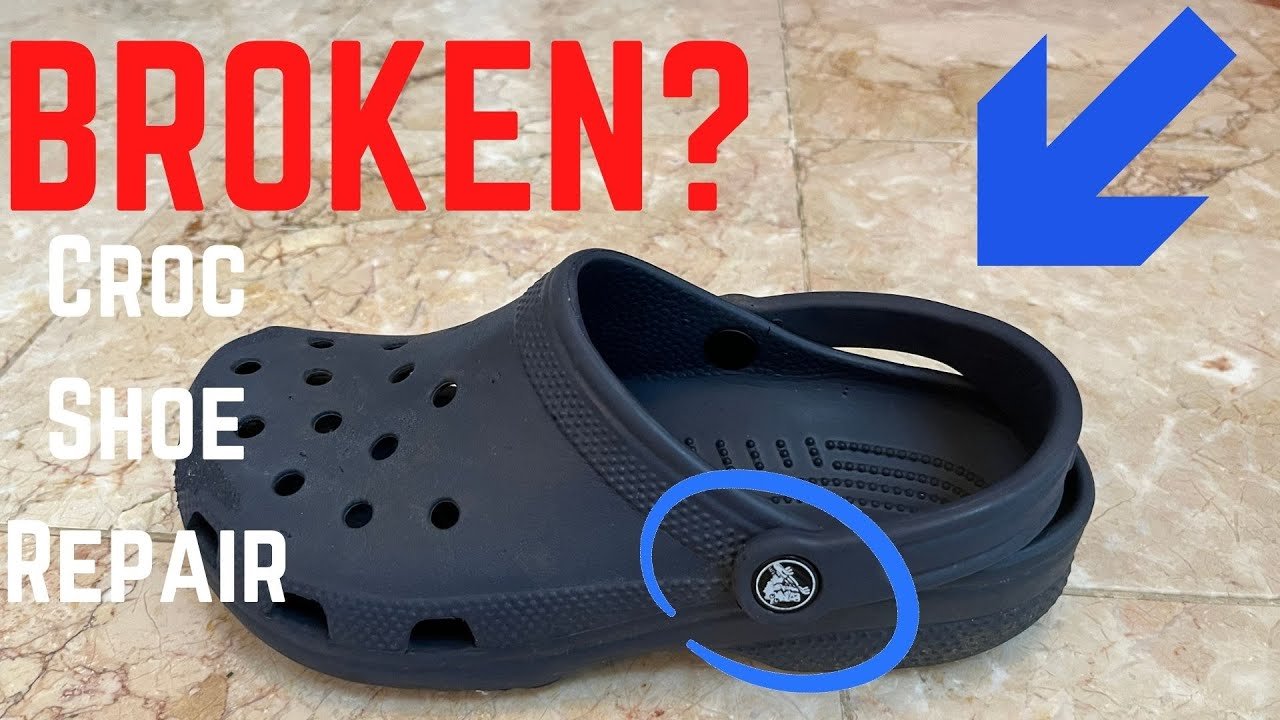
- Remove the old rivet: Use pliers to grip the old rivet, then gently pull it out. Be careful not to damage the surrounding material.
- Insert a new rivet: Take a replacement rivet and insert it into the hole left by the old rivet. Make sure it sits flush with the surface.
- Crimp the new rivet: Use pliers to crimp the new rivet, securing it in place. Apply enough pressure to ensure a tight fit.
- Repeat for other rivets: If you need to replace multiple rivets, repeat the process for each one.
Reinforcing Weak Points
Over time, certain areas of your Crocs may become weak or prone to damage. To reinforce these areas and prevent future issues, consider these tips:
- Apply adhesive: Use strong adhesive, such as Shoe Goo or E6000, to reinforce weak points, such as the area around the strap attachment or any other vulnerable spots.
- Add stitching: If you have some basic sewing skills, reinforce weak areas by adding stitches with a needle and thread. This can provide extra strength and longevity to your Crocs.
- Regular maintenance: Perform regular inspections of your Crocs to identify any weak points or signs of damage early on. By addressing these issues promptly, you can prevent further damage and extend the lifespan of your Crocs.
Extra Tips for Crocs Repair
Here are a few additional tips to help you with your Crocs repair:
- Follow manufacturer guidelines: Check if your Crocs come with any specific repair instructions from the manufacturer. Following these guidelines can ensure optimal results.
- Be patient: Allow sufficient time for the adhesive to dry and cure. Rushing the process can result in a weaker bond and less effective repairs.
- Consider professional repair: If you’re unsure about tackling the repairs on your own or if the damage is extensive, it may be worth seeking the help of a professional shoe repair service.
- Prevention is key: Take preventative measures, such as avoiding excessive strain on the straps or rough handling, to minimize the need for future repairs.
Remember, Crocs are known for their durability, but accidents happen. With a little know-how and the right tools, you can easily repair your Crocs and extend their lifespan. Whether it’s fixing a broken strap, patching a hole in the sole, or reinforcing weak points, these repair techniques will help you get the most out of your favorite pair of Crocs.
How to repair the rivet/strap on your Crocs
Frequently Asked Questions
How do I repair my Crocs if they have a small hole?
If you have a small hole in your Crocs, you can use a strong adhesive like E6000 to repair it. Clean and dry the area around the hole, then apply the adhesive and press the sides of the hole together. Allow it to dry according to the adhesive’s instructions, and your Crocs should be good as new.
What should I do if the strap on my Crocs breaks?
If the strap on your Crocs breaks, you can easily replace it with a new one. Crocs offers replacement straps that you can purchase online or from their stores. Simply remove the broken strap by pushing the pins through the holes, and then attach the new strap by inserting the pins into the holes. Make sure they are securely fastened before wearing your Crocs again.
Can I fix my Crocs if the sole is coming off?
If the sole of your Crocs is starting to detach, you can repair it using a strong adhesive specifically designed for footwear repair. Clean the area thoroughly, apply the adhesive to both the sole and the shoe body, and press them firmly together. Place some heavy objects on top while the adhesive dries to ensure a secure bond. Once dry, your Crocs should be ready to wear again.
What can I do if the heel strap on my Crocs becomes loose?
If the heel strap on your Crocs becomes loose, you can tighten it by adjusting the strap holes. Simply push the strap through a different set of holes to achieve a snug fit. Experiment with different hole combinations until you find the desired level of tightness. This will help prevent your Crocs from slipping off while walking.
How can I repair a worn-out insole in my Crocs?
If the insole of your Crocs is worn out and uncomfortable, you can replace it with a new one. Crocs offers replacement insoles that are specifically designed to fit their shoes. Remove the old insole and replace it with the new one by inserting it securely into the shoe. Ensure that the new insole is properly aligned and fits comfortably before using your Crocs again.
Final Thoughts
Crocs are a popular choice for comfortable and casual footwear, but like any shoes, they can wear out over time. Fortunately, repairing Crocs is a simple and cost-effective solution that can extend their lifespan. By following a few easy steps, such as cleaning the shoes, using adhesive, and considering a replacement strap, you can easily restore your Crocs to their original condition. It is important to take care of your Crocs and repair them when needed, ensuring they remain a reliable and comfortable footwear option for years to come. So, if you find yourself with a pair of worn-out Crocs, don’t fret – repairing them is a straightforward process that can be easily accomplished at home.
