Are your beloved Crocs suffering from a dreaded rip? Don’t despair! In this article, we’ll show you how to fix ripped Crocs and give them a new lease on life. Whether you accidentally caught them on something sharp or they simply wore down over time, we’ve got you covered. No need to stress about throwing them away or buying a new pair—by following our simple steps, you’ll have your Crocs looking good as new in no time. So let’s dive in and learn how to fix ripped Crocs!
How to Fix Ripped Crocs
Crocs have become a popular footwear choice for their comfort and durability. However, over time, your favorite pair of Crocs may experience wear and tear, leading to rips and tears. Instead of throwing them away, why not learn how to fix ripped Crocs and extend their lifespan? In this comprehensive guide, we will explore various techniques and methods to help you repair your beloved Crocs and get them back in shape. From simple stitching to more advanced repair options, we’ve got you covered.
Section 1: Assessing the Damage
Before diving into the repair process, it’s crucial to assess the extent of the damage on your Crocs. This section will guide you through a step-by-step process to evaluate the severity of the rips and determine the best approach for fixing them.
1.1 Identifying the Ripped Areas
Start by examining your Crocs closely to identify any visible rips or tears. Look for areas where the material is frayed, split, or completely torn. Take note of the size and location of each damage to prepare for the repair process.
1.2 Understanding the Crocs Material
Crocs are typically made of a unique foam resin called Croslite. Understanding the material composition is essential as it affects the repair technique you choose. Croslite can vary in thickness and density, which can affect the way you fix the rips.
1.3 Assessing the Severity of the Damage
Once you’ve identified the ripped areas, assess the severity of the damage. Determine whether the rip is superficial or deep. This evaluation will help you decide on the appropriate repair method.
Section 2: Repairing Minor Rips
For minor rips and tears, you can easily fix them at home with basic tools and materials. In this section, we’ll explore a few simple techniques to repair minor damages and keep your Crocs in great condition.
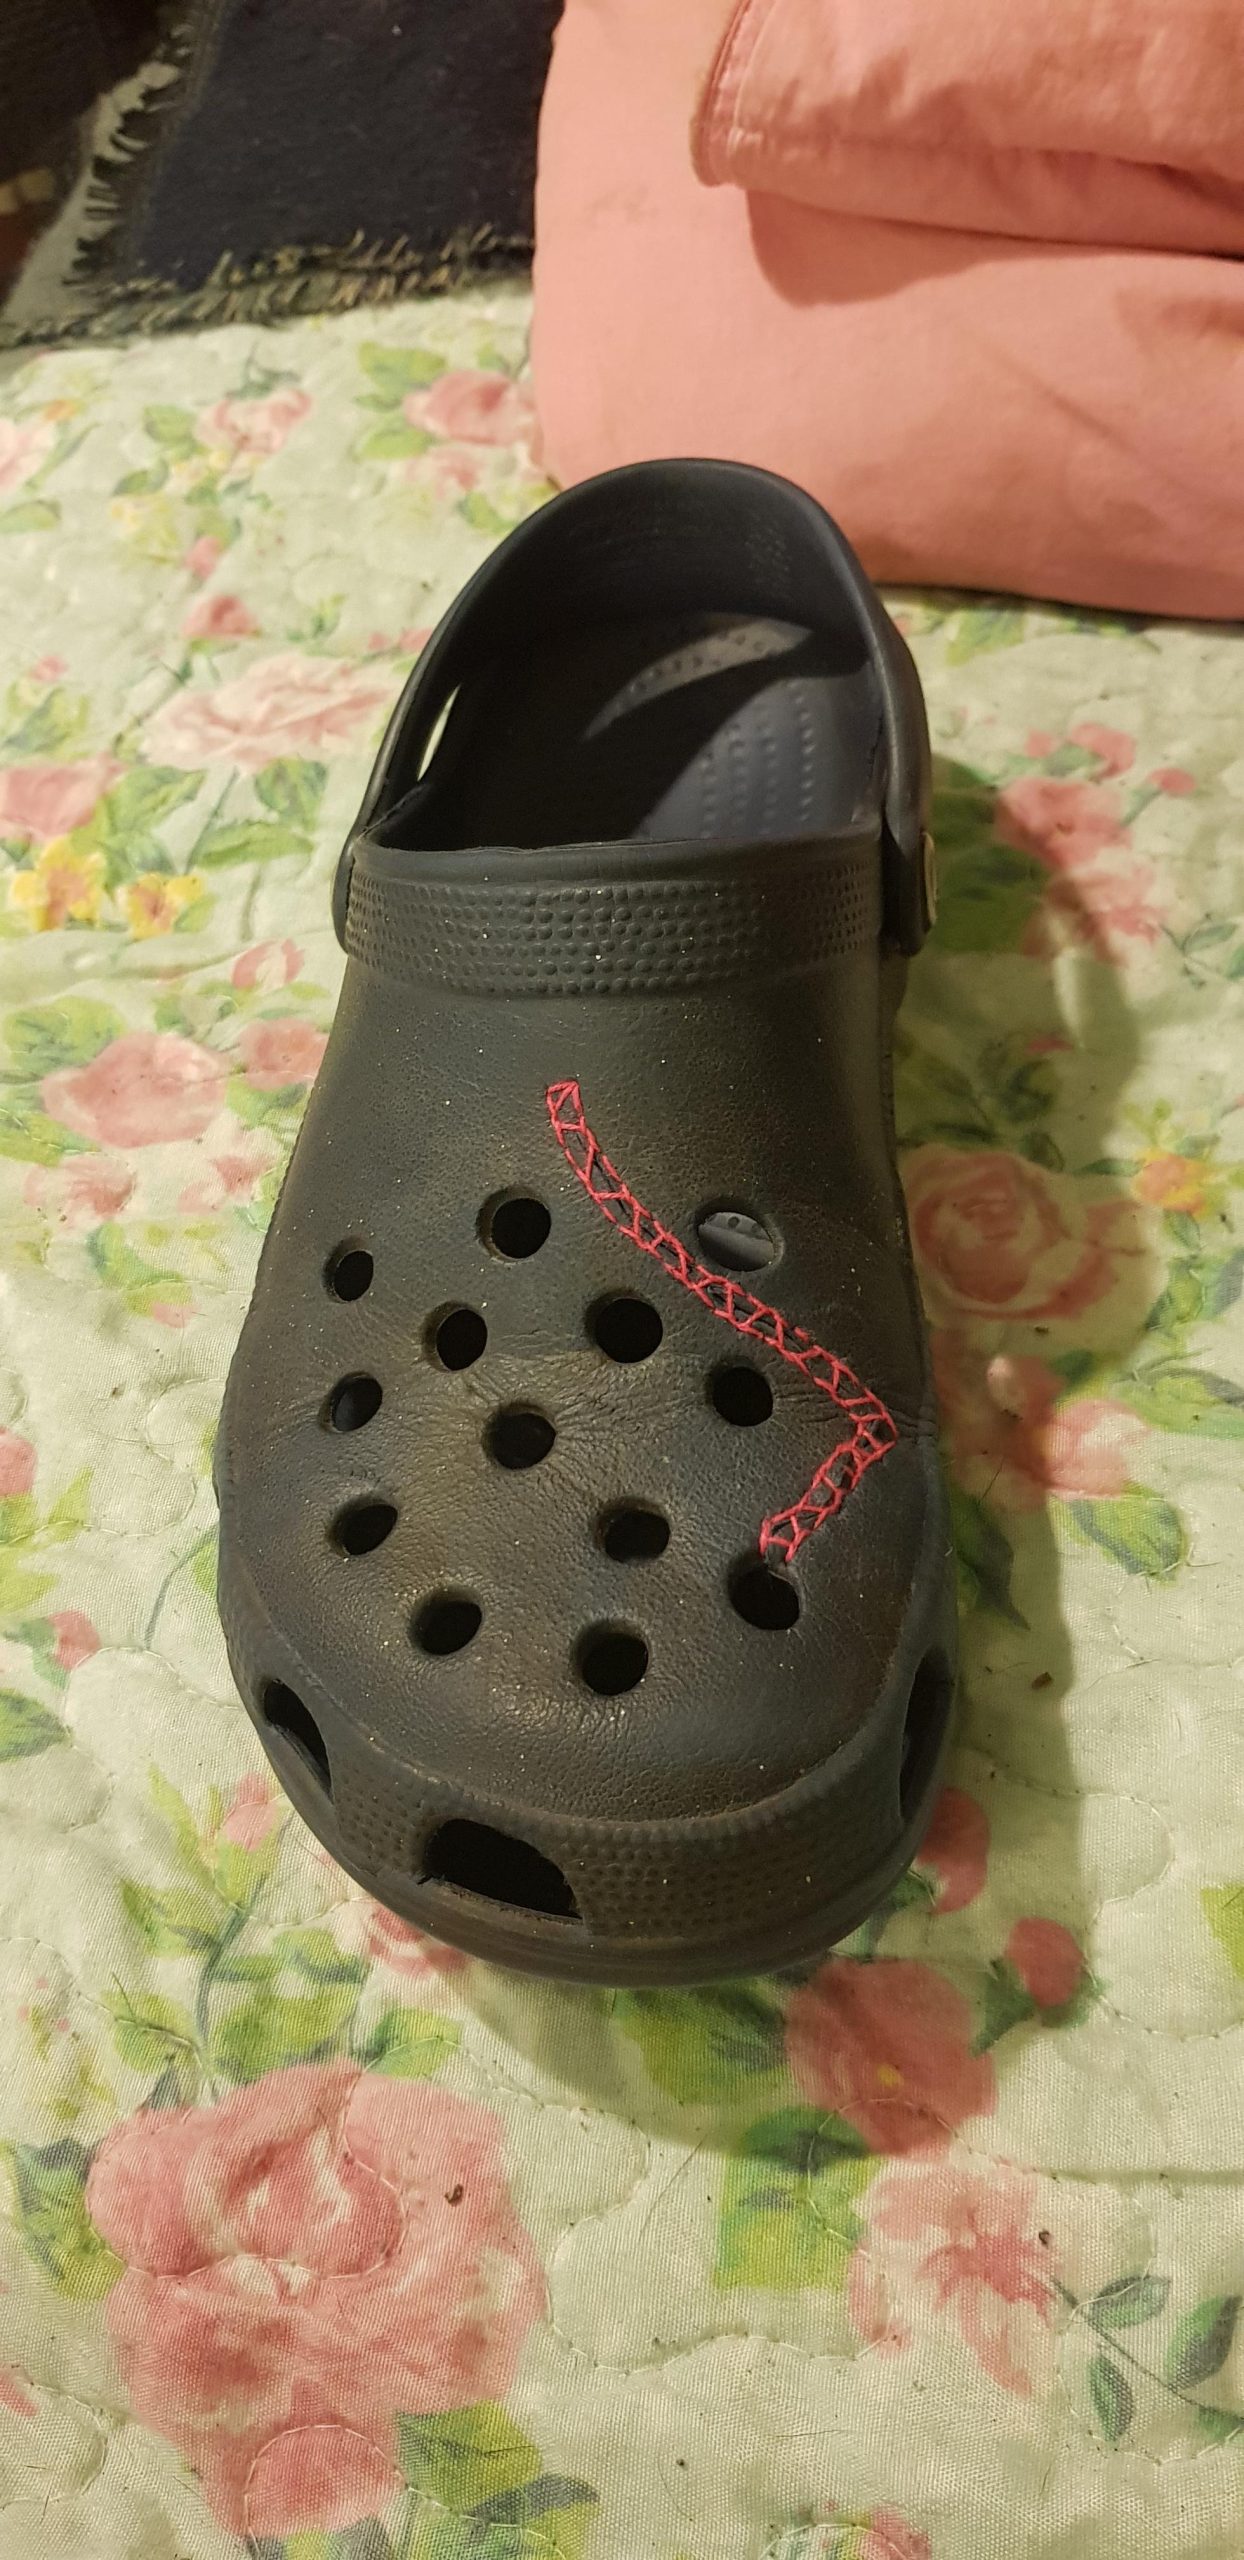
2.1 Hand Stitching the Rips
If you’re handy with a needle and thread, you can fix small tears by hand stitching. This method works well for Crocs with thin or moderate-width rips. We’ll walk you through the step-by-step process of hand stitching and provide helpful tips for a successful repair.
2.2 Using Shoe Glue for Small Rips
Shoe glue is a convenient option for repairing minor rips in your Crocs. In this subheading, we’ll explain how to use shoe glue effectively to mend small tears. We’ll recommend suitable shoe glues and guide you through the application process.
Section 3: Repairing Major Rips
For larger or more severe rips, you may need to employ more advanced repair techniques. This section will delve into repair methods that are better suited for significant damages, ensuring your Crocs regain their original strength.
3.1 Patching Larger Rips with Duct Tape
When dealing with larger rips, duct tape can be a temporary solution to keep your Crocs intact. We’ll show you how to patch the ripped areas using duct tape and offer tips on maximizing its effectiveness. Keep in mind that duct tape is not a permanent fix, but it can buy you time until you can pursue a more robust repair.
3.2 Utilizing Epoxy Resin for Deep Rips
If you encounter deep rips that require a stronger solution, epoxy resin can provide a more permanent fix. This subheading will guide you through the process of using epoxy resin to repair and reinforce the damaged areas, ensuring your Crocs are durable enough to withstand daily wear.
Section 4: Preventing Future Rips
Now that you’ve successfully repaired your ripped Crocs, it’s important to take preventive measures to avoid future damages. This section will provide practical tips and advice to help you maintain your Crocs and prolong their lifespan.
4.1 Proper Crocs Care and Maintenance
Learn how to properly care for and maintain your Crocs to prevent rips and tears. We’ll cover cleaning techniques, storing guidelines, and general maintenance tips to keep your Crocs looking and feeling their best.
4.2 Choosing the Right Size and Fit
Wearing Crocs that are too tight or too loose can increase the risk of rips. We’ll discuss the importance of selecting the correct size and fit for your Crocs to reduce stress on the material and minimize the chances of future damages.
Section 5: Recycling and Upcycling Crocs
If your Crocs are beyond repair or you’re simply looking for a creative way to repurpose them, this section will provide inspiring ideas for recycling and upcycling your worn-out footwear. From DIY crafts to donation programs, you’ll discover environmentally friendly ways to give your old Crocs a new lease on life.
In conclusion, learning how to fix ripped Crocs can save you money and help reduce waste. Whether you opt for simple stitching, shoe glue, duct tape, or more advanced methods like epoxy resin, repairing your Crocs is a rewarding and sustainable choice. By following the techniques and tips outlined in this guide, you’ll be able to extend the lifespan of your favorite Crocs and continue enjoying their comfort and style.
Remember to always assess the damage and choose the appropriate repair method based on the severity of the rips. Additionally, preventive measures such as proper care, maintenance, and choosing the right size and fit can significantly reduce the likelihood of future damages.
So don’t let ripped Crocs discourage you. With a little effort and know-how, you can easily fix them and keep them in excellent condition for years to come.
Rip my crocs
Frequently Asked Questions
How can I fix a ripped pair of Crocs?
If you have a pair of Crocs that have a rip, follow these steps to fix them:
What materials will I need to fix my ripped Crocs?
You will need a few materials to fix your ripped Crocs, including a strong adhesive like shoe glue or a heavy-duty fabric glue, sandpaper or a rough sponge, and a small brush or applicator to apply the glue.
How do I prepare the surface of my ripped Crocs for fixing?
First, clean the area around the rip with warm water and mild soap. Then, use sandpaper or a rough sponge to roughen up the surface of the Crocs around the rip. This will help the adhesive bond more effectively.
What is the best way to apply the adhesive to my ripped Crocs?
Apply a thin layer of adhesive to both sides of the rip, making sure to spread it evenly. Press the sides of the rip together firmly and hold them in place for a few minutes to allow the adhesive to bond.
How long should I let the adhesive dry before wearing my fixed Crocs?
It is recommended to let the adhesive dry for at least 24 hours before wearing your repaired Crocs. This will ensure that the bond is strong and secure.
Can I reinforce the repaired area of my Crocs for extra durability?
Yes, you can reinforce the repaired area by applying an additional layer of adhesive on top of the initial repair. This will provide extra strength and help prevent future rips.
What should I do if my Crocs rip again after I have fixed them?
If your Crocs rip again after you have fixed them, you can repeat the repair process using the same steps outlined above. However, if the rips continue to occur, it may be time to consider purchasing a new pair of Crocs.
Final Thoughts
To fix ripped Crocs, follow these simple steps. First, clean and dry the area around the rip. Then, apply a strong adhesive like shoe glue or a heavy-duty fabric adhesive to both sides of the rip. Press the two sides together and hold them in place for a few minutes to allow the adhesive to bond. Finally, let the repaired Crocs dry completely before wearing them again. With these easy steps, you can quickly and effectively fix ripped Crocs and extend their lifespan. Don’t let a rip ruin your favorite pair – repair them and enjoy them for longer.
